Imagine diving into your refreshing gunite pool on a hot summer day, only to be greeted by an unexpected decrease in water levels the next time you take a dip. The culprit? A pesky leak. Gunite pools are known for their durability, but over time, wear and tear or other factors may lead to leaks. In this comprehensive guide, we will walk you through the process of finding and repairing leaks in your gunite pool, allowing you to enjoy your aquatic oasis once again.
Understanding Gunite Pools
Before we jump into detecting and repairing leaks, let’s understand what makes gunite pools unique. Gunite refers to the material used to construct these pools, which is a mixture of cement, sand, and water. The mixture is pneumatically sprayed onto a reinforced steel framework, creating a strong and durable pool shell. Gunite pools are known for their longevity, flexibility in design, and ability to withstand harsh weather conditions. For full understanding in details just check out our latest article about What Are Gunite Pools – Unveiling the Wonders
Signs of a Leaking Gunite Pool
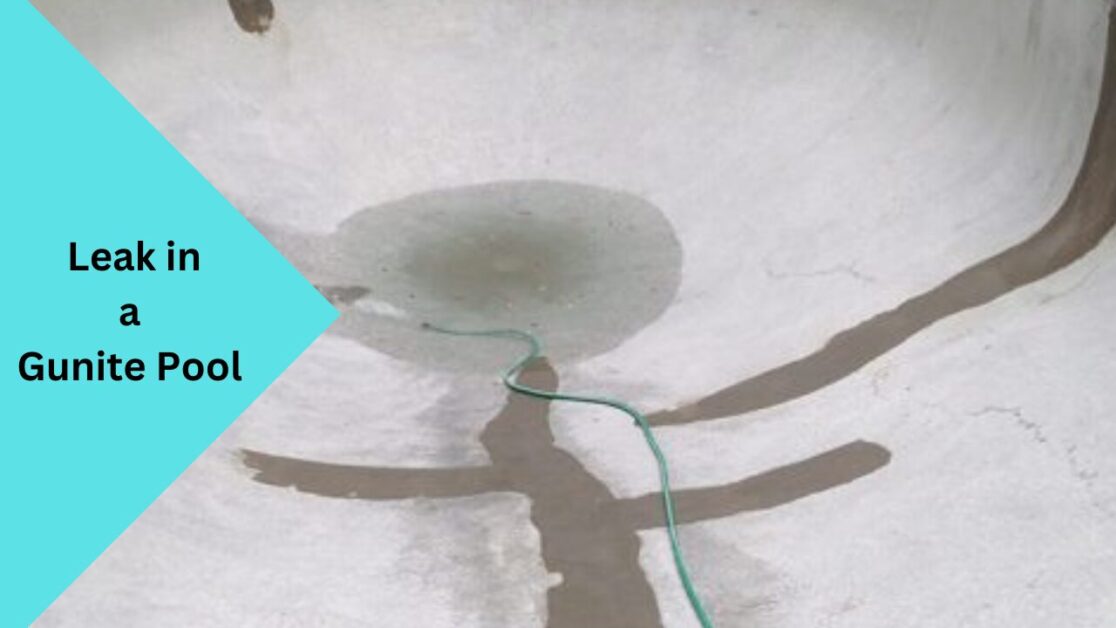
Detecting a leak early on can save you time, money, and frustration. Keep an eye out for the following signs that may indicate a leak in your gunite pool:
- Decreasing water level: Noticeable and consistent water loss, especially beyond normal evaporation rates, is a red flag.
- Air bubbles: If you see air bubbles escaping from cracks or crevices in your pool, it could be a sign of a leak.
- Algae growth: Leaks provide a perfect breeding ground for algae due to uneven water circulation and chemical imbalances caused by water loss.
- Sinkholes or wet spots: Excessive moisture around the pool area or sunken patches on the ground near the pool may indicate a leak in the underground plumbing.
- Pool deck damage: Cracks, gaps, or unevenness in the pool deck can indicate shifting or settling due to leaks.
How to Find a Leak in a Gunite Pool
Now that you’re aware of the signs, let’s dive into the process of locating a leak in your gunite pool. Follow these steps to effectively troubleshoot and pinpoint the source of the leak:
Step 1: Conducting a Visual Inspection
Begin your leak detection mission with a thorough visual inspection. Carefully examine the entire pool, focusing on these areas:
- Pool surface: Look for cracks, holes, or spaces where the gunite may have deteriorated.
- Pool equipment: Inspect the filter, pump, valves, and pipes for any signs of leakage or damage.
- Skimmer and return lines: Ensure that these openings are intact and properly sealed.
- Pool accessories: Check the lights, drains, and other pool accessories for any signs of leakage.
Step 2: Testing the Water Levels
Maintaining accurate water levels is crucial for effective leak detection. Follow these steps to assess the water loss:
- Fill the pool to its normal level and mark the waterline.
- Turn off the pool equipment, including pumps and filters.
- Wait for 24 to 48 hours and monitor the water level.
- If the water drops more than the average evaporation rate, it suggests a leak is present.
Step 3: Using Dye Testing Method
The dye testing method helps identify leaks in hard-to-reach areas, such as cracks or fittings. Here’s how to employ this technique:
- Ensure all pool equipment is off.
- Drop a dye testing solution near suspected leak points or fittings.
- Observe if the dye is pulled into the crack or fitting, indicating a leak.
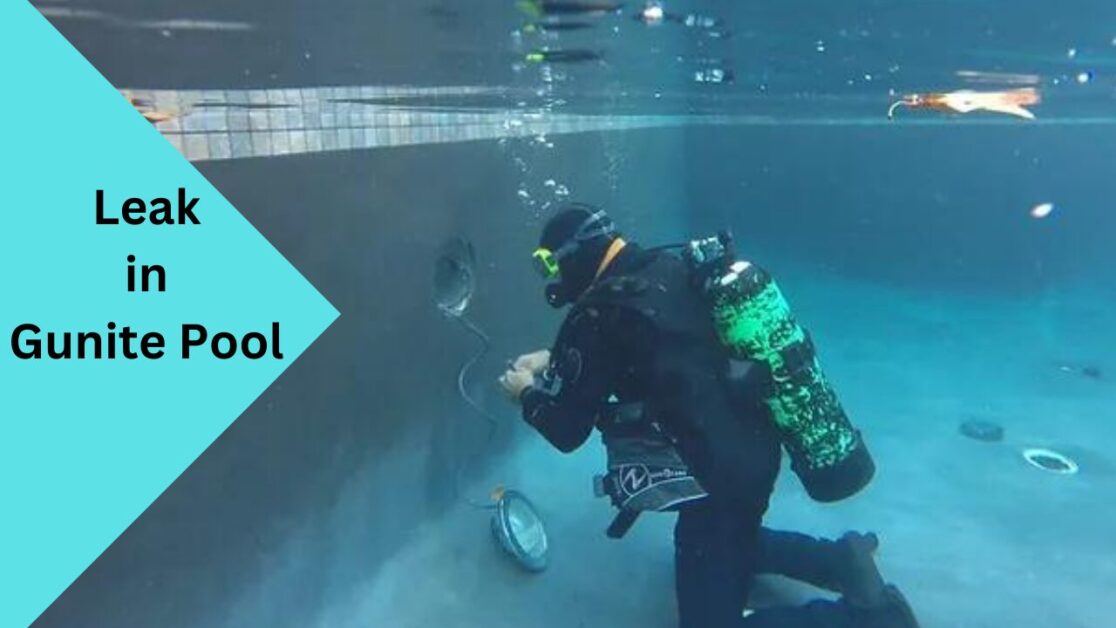
Step 4: Pressure Testing
In some cases, pressure testing can be an effective way to identify leaks. It involves isolating sections of the plumbing system to detect any loss of pressure, which indicates a leak. Consider hiring a professional to perform this procedure for accurate results.
Step 5: Investigating the Pool Equipment
Pool equipment can often be the source of leaks. Inspect the following areas:
- Filtration system: Check for leaking valves, cracked pipes, or damaged filters.
- Pump and motor: Examine for any visible signs of leakage or worn-out gaskets.
- Plumbing connections: Ensure that all plumbing connections are secure and not causing any leaks.
How to Repair a Leak in a Gunite Pool
Once you’ve successfully identified the location of the leak, it’s time to address the issue. The repair method will depend on the size, severity, and location of the leak. Here are two common options:
Option 1: DIY Patching
For smaller leaks that are easily accessible, you can opt for DIY patching techniques. Here’s a step-by-step guide:
- Drain the pool water to below the level of the leak.
- Clean and dry the affected area thoroughly.
- Apply an underwater repair epoxy or hydraulic cement to the leak.
- Smooth out the patch, ensuring there are no gaps or rough edges.
- Allow the patch to cure as per the manufacturer’s instructions.
- Refill the pool and monitor for any further signs of leakage.
Option 2: Seeking Professional Help
For larger or hard-to-reach leaks, professional assistance is recommended. Certified pool technicians have the expertise and equipment to tackle challenging leaks. They may use methods such as pressure testing, thermal imaging, or specialized underwater sealants to repair the leak effectively.
Prevention and Maintenance Tips
Preventing pool leaks is easier and more cost-effective than repairing them. Follow these tips to maintain a leak-free gunite pool:
- Regular maintenance: Keep up with routine maintenance, including cleaning, checking equipment, and addressing any signs of deterioration promptly.
- Monitor water chemistry: Maintain proper water balance and regularly check the pH, alkalinity, and sanitizer levels to avoid chemical imbalances that can damage the pool shell.
- Handle the pool cover with care: When removing or installing the pool cover, take care to prevent any sharp objects or excessive tension that could cause tears or punctures.
- Be cautious with pool accessories: Ensure that any accessories, such as diving boards or slides, are properly installed and do not create stress on the pool structure.
- Address plumbing issues promptly: If you notice any plumbing problems, such as low water pressure or noisy pipes, have them repaired immediately to prevent potential leaks.
Conclusion
A leak in your gunite pool may seem like a daunting challenge, but armed with the right knowledge and tools, you can tackle it effectively. By utilizing the methods outlined in this guide, you can confidently detect and repair leaks without compromising the integrity of your pool. Remember, regular maintenance and prompt action are key to preventing leaks and enjoying your gunite pool for years to come. So dive in, fix those leaks, and get ready to make a splash in your pristine oasis once again!

Greetings, fellow pool enthusiasts! I’m Turner Davis, your dedicated guide to the world of pool care and maintenance. With over a decade of experience in the field, I’ve made it my mission to transform ordinary pools into extraordinary aquatic retreats.