Imagine lounging by your own personal oasis – a luxurious gunite pool right in your backyard. Building a gunite pool may seem like a daunting task, but with the right guidance, you can bring this dream to life. Whether you’re a seasoned DIY enthusiast or a novice looking for a rewarding challenge, this step-by-step guide will help you create a stunning gunite pool that adds value to your property and brings endless joy to your family and friends.
Are you ready to embark on this exciting journey of building your own gunite pool? In this comprehensive guide, we’ll cover everything from the advantages of gunite pools to the step-by-step construction process. Let’s dive in!
What is a Gunite Pool?
Before we delve into the process of building a gunite pool, let’s understand what exactly a gunite pool is. A gunite pool is a type of in-ground pool constructed using a mixture of sand, cement, and water, commonly known as gunite or shotcrete. This mixture is pneumatically sprayed onto a framework of rebar, creating a durable, solid structure that can be customized to any shape or size.To explore more details and considerations regarding Gunite Pools, our comprehensive guide on What Are Gunite Pools – Unveiling the Wonders has you covered.
Why Choose a Gunite Pool?
Gunite pools offer numerous benefits, making them a popular choice among homeowners. Here are a few reasons why you should consider a gunite pool for your backyard:
- Customization: Gunite pools offer unmatched flexibility in design. Unlike pre-fabricated pools, gunite allows for limitless customization, allowing you to create a pool that perfectly suits your aesthetic preferences and fits seamlessly into your backyard landscape.
- Durability and Longevity: The robust nature of gunite makes it highly resistant to wear and tear. With proper maintenance, a well-built gunite pool can last for several decades, providing a long-term investment in your property.
- Versatility: Gunite pools are not limited to specific shapes or sizes. You can create freeform or geometric designs, incorporate unique features like waterfalls or slides, and adjust the depth to cater to different activities and preferences.
- Value Addition: A professionally constructed gunite pool enhances the value of your property. The sheer elegance and versatility of a gunite pool can attract potential buyers and significantly increase the overall appeal of your home.
Pros and Cons of Gunite Pools
As with any major home improvement project, it’s important to consider both the advantages and disadvantages. Let’s take a closer look at the pros and cons of gunite pools:
Pros:
- Customizable to any shape and size
- Durable and long-lasting
- Ability to add unique features
- Increases property value
- Provides a luxurious backyard retreat
Cons:
- Higher upfront cost compared to other pool types
- Requires professional expertise for construction
- Longer construction time compared to pre-fabricated pools
- Regular maintenance is essential to prevent cracks and staining
By weighing these pros and cons against your specific needs and budget, you can make an informed decision about whether a gunite pool is the right choice for you. Furthermore, dive into deep with our full guide about Exploring Gunite Pools: Pros and Cons
Considerations before Building a Gunite Pool
Before you start digging, it’s crucial to consider a few essential factors:
- Site Evaluation: Assess your backyard to determine the ideal location for your gunite pool. Consider sunlight exposure, soil conditions, proximity to trees or utility lines, and any potential obstacles that may affect the construction process.
- Budget Planning: Building a gunite pool involves significant investment. Set a budget that includes not just the construction costs but also potential extras like landscaping, pool accessories, and ongoing maintenance.
- Permits and Regulations: Check with your local authorities to understand the necessary permits and regulations for building a pool. Compliance with local codes ensures the safety and legality of your project.
- Professional Assistance: While this guide empowers you to build a gunite pool yourself, it’s important to evaluate your skill level and consider hiring professionals for certain aspects of the construction process, such as excavation or plumbing installation.
Now that you’ve assessed these considerations, let’s dive into the step-by-step guide on how to build a gunite pool.
Step-by-Step Guide on How to Build a Gunite Pool
Step 1: Preparing the Site
Before construction begins, it’s crucial to properly prepare the site:
- Clear the area of any debris, trees, or obstructions that may hinder construction.
- Ensure the site is level and allows for proper water drainage.
- Mark the pool’s location using stakes and string to outline the pool’s shape and dimensions.
Step 2: Excavating the Pool Area
Excavation is the process of digging out the pool area to create space for its structure. Follow these steps:
- Rent heavy machinery to excavate the pool area according to the pre-determined dimensions.
- Gradually dig the pool area, taking caution to prevent damaging any utility lines or pipes.
- Create a sloped area for the pool’s floor, ensuring that it gradually deepens towards the deep end.
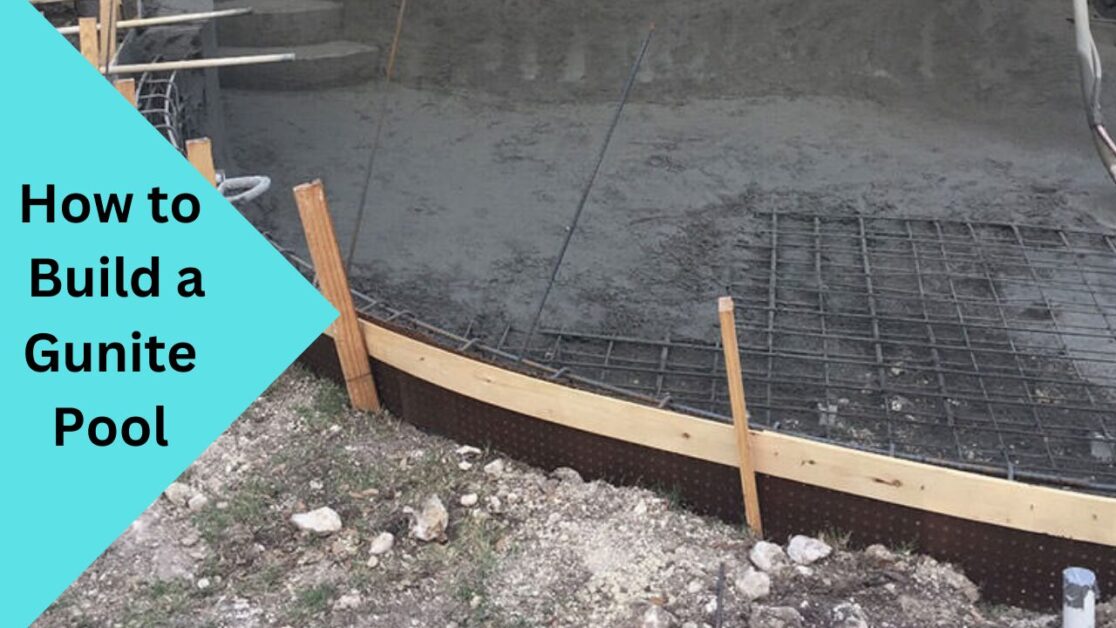
Step 3: Constructing the Pool Walls
The pool walls provide structural integrity. Here’s how to build them:
- Install a sturdy framework using rebar to define the pool’s basic shape.
- Attach the rebar framework to the pool deck using wire ties to maintain stability.
- Check the vertical alignment using a level and adjust as needed.
- Secure the rebar framework using steel stakes driven into the ground.
- Ensure the framework is designed to accommodate necessary plumbing and filtration systems.
Step 4: Installing Plumbing and Filtration Systems
Proper plumbing and filtration systems ensure optimal functionality. Consider these steps:
- Identify the ideal locations for inlets, outlets, drains, skimmers, and equipment pads.
- Install the necessary pipework to connect these components.
- Place plumbing lines according to the design and specifications of the pool.
Step 5: Spraying Gunite or Shotcrete
This step involves applying the gunite mixture to create the pool structure:
- Hire a professional crew experienced in applying gunite or shotcrete.
- The crew will use a high-pressure hose to spray the gunite mixture onto the rebar framework, gradually building up the structure.
- Ensure the entire framework is covered evenly, paying attention to the corners and angles.
- Spraying is typically done in layers, allowing each layer to cure before applying the next.
- To explore more details and considerations regarding Gunite and Shotcrete, our comprehensive guide on this has you covered.
Step 6: Finishing Touches and Pool Equipment
Now it’s time to add the finishing touches and install the necessary equipment:
- Select and install pool tile, coping, and any additional desired features.
- Install pool equipment, such as pumps, filters, heaters, and lighting systems.
- Connect the equipment to the plumbing system and electrical supply.
Step 7: Curing the Gunite Pool
After the construction is complete, it’s crucial to allow the gunite pool to cure properly:
- Fill the pool gradually to avoid stressing the structure with sudden pressure.
- Monitor the water levels and maintain them accordingly.
- Follow industry-standard recommendations for curing time before opening the pool for regular use.
How Thick Should a Gunite Pool Be?
The thickness of a gunite pool plays a crucial role in its structural integrity. It’s typically recommended to have a minimum thickness of 6–8 inches for the pool walls and floor. However, consult a professional pool builder to determine the ideal thickness based on the pool’s size, shape, and depth.
Adjusting the Depth: Making a Gunite Pool Shallower
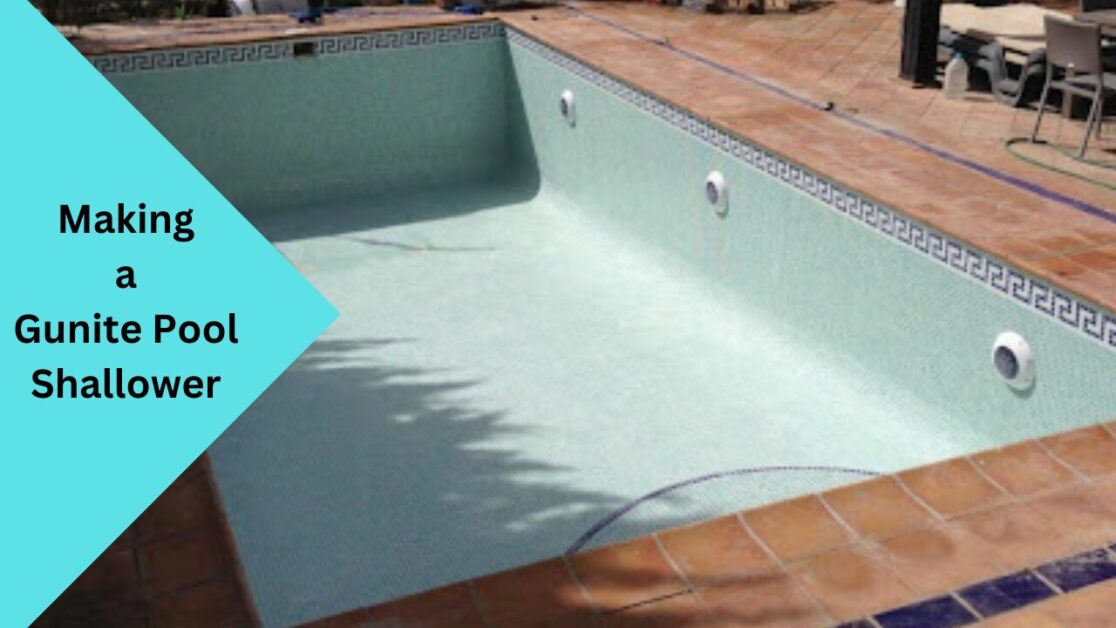
If you’d like to make a gunite pool shallower or adjust its depth, follow these steps:
- Drain the pool to the desired depth with the help of a pool pump.
- Prepare the pool’s surface for recoating by removing any debris or loose materials.
- Apply a new layer of gunite to the pool’s walls and floor, gradually building up to the desired depth.
- Ensure the new gunite layer integrates seamlessly with the existing structure.
- Allow the new layer to cure thoroughly before refilling the pool and resuming regular use.
Maintaining and Extending the Lifespan of a Gunite Pool
To maximize the longevity and enjoyment of your gunite pool, follow these maintenance tips:
- Regularly test and balance the water chemistry to prevent staining and algae growth.
- Clean the pool surface regularly using appropriate tools and equipment.
- Keep the pool equipment, such as pumps and filters, well-maintained and serviced.
- Winterize the pool properly to protect it during colder months.
- Consider resurfacing the pool every 10–15 years to maintain its visual appeal and structural integrity.
By following these maintenance practices, you can ensure your gunite pool remains a source of joy for years to come.
Conclusion
Congratulations! You’ve reached the end of our comprehensive guide on how to build a gunite pool. We hope this step-by-step approach has provided you with valuable insights and empowered you to embark on this thrilling DIY project.
Remember, building a gunite pool requires careful planning, attention to detail, and adherence to local regulations. While the process may seem challenging, the end result – a beautiful and personalized backyard oasis – is well worth the effort.
So, what are you waiting for? Dive into the world of gunite pool construction and create unforgettable memories for yourself and your loved ones. If you have any questions or need further assistance, don’t hesitate to reach out to our team of experts.

Greetings, fellow pool enthusiasts! I’m Turner Davis, your dedicated guide to the world of pool care and maintenance. With over a decade of experience in the field, I’ve made it my mission to transform ordinary pools into extraordinary aquatic retreats.